
01. Arduino for Production!! Introduction to ARM Microcontrollers
This is the first in an ongoing series on the ARM microcontroller, how to program the microcontroller and the circuit building associated with this controller. This will be a series very similar to the AVR series that you can find on newbiehack.com. I will be demonstrating many different types of circuits, control, communication and sensing using the ARM M0 through the Latest M series that is available at the time of the video creation. 
For those of you that may not know what a microcontroller is, or what is does: a microcontroller can do what its name implies: control. But it can also sense, receive input, respond to events, and communicate with other devices and peripherals such as external computers, other microcontrollers, or other devices that have integrated circuitry that enables it to communicate.
The ways that microcontrollers can sense is that they can receive analog input from a sensor and have that input converted into a digital format enabling the microcontroller to sense things such as temperature, light, sound, pressure, angular momentum, gravity, movement, etc.

Microcontrollers can communicate to other devices and computers using serial communication such as I2C, UART, SPI, and all of these can enable wireless communication like Wi-Fi, Bluetooth, radio frequency, etc. Microcontrollers can also receive digital input not related to serial communication, such as button presses, encoder pulses, PWM signal, and other types of on/off signals coming in.

The style of instruction I like to give is based on the lowest level fundamentals with circuit building, which means using the single processor and building off of that, not using a platform like the Arduino, discovery board, or Raspberry P (RPi). Learning in this more fundamental way will engender better foundational knowledge on how to design efficiently and prototype for large production. If you start with a platform that already has a large buildup of circuitry, once you embark on making a real design for production, you need to take steps backward to get to an efficient prototype. Keep Arduinos and other interface platforms to one off projects, and learn the fundamentals if you want to get into design that is efficient and cost effective.

The programming language used will be c++ and in most cases, I will create the libraries rather than using existing libraries. This will allow you to understand the code fundamentals on how the peripherals and external devices really work and you will be able to code more efficiently. There will be cases that I use libraries where the creation of a library would be far too complex and that the library in question has already gone through quite a bit of scrutiny. One library that comes to mind is accessing a file system on an SD card where the library has functions to read, write and manipulate a FAT File allocation system.
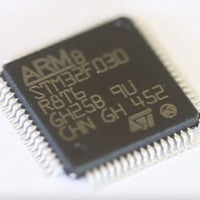
Since the microcontroller is a surface mount device, we can't just plug this into a breadboard. We need a way to get the pins into a breadboard and we will be using this card and interface. The card simply contains the ARM microcontroller and a way to get the legs of the microcontroller into the tie strips of the breadboard.

The card was design to specifically use three breadboards, one for each of three sides of the card. The configuration works well since there are many tie strip connections for each pin and there is a break between the breadboard to add a resistor or other component to another tie strip. For instance, a resistor can be placed here and the LED placed here which is more visually coherent than placing the components in a zigzag on neighboring tie strips. We will delve into the reference manual for this microcontroller from time to time. The STM32F030 reference manual is complete with all the information you will need to access all of the features of the STM32F030 microcontroller. If you need technical or electrical specifications for this microcontroller, click on this link: STM32F030 Datasheet
[[TUTORIALMENU(tutorial-arm" frameborder="0" allowfullscreen>
STM32 PCB Breakout Diagram and Pinout
Use the scroll bars to pan the diagram to see the pins on the right and at the bottom.